Discussions
The Discussions area is a place to exchange messages between groups of your portal members in between meetings.
Overview
Discussions on Our Cat Herder are broken into groups. These groups can be public (to your portal members) or private (only accessible to those portal members you specify). Within each group you can then start topic based discussions.
Discussion Groups allow you to separate discussions into logical groups. You might have one for your main board and others for various sub-committees.
Why use discussions instead of email?
You probably know the pain of the email CC'd to 12 or more people that has multiple replies and trying to navigate it. The Our Cat Herder discussions function gives you a way to create order and structure around these discussions in a central place accessible to all portal members.
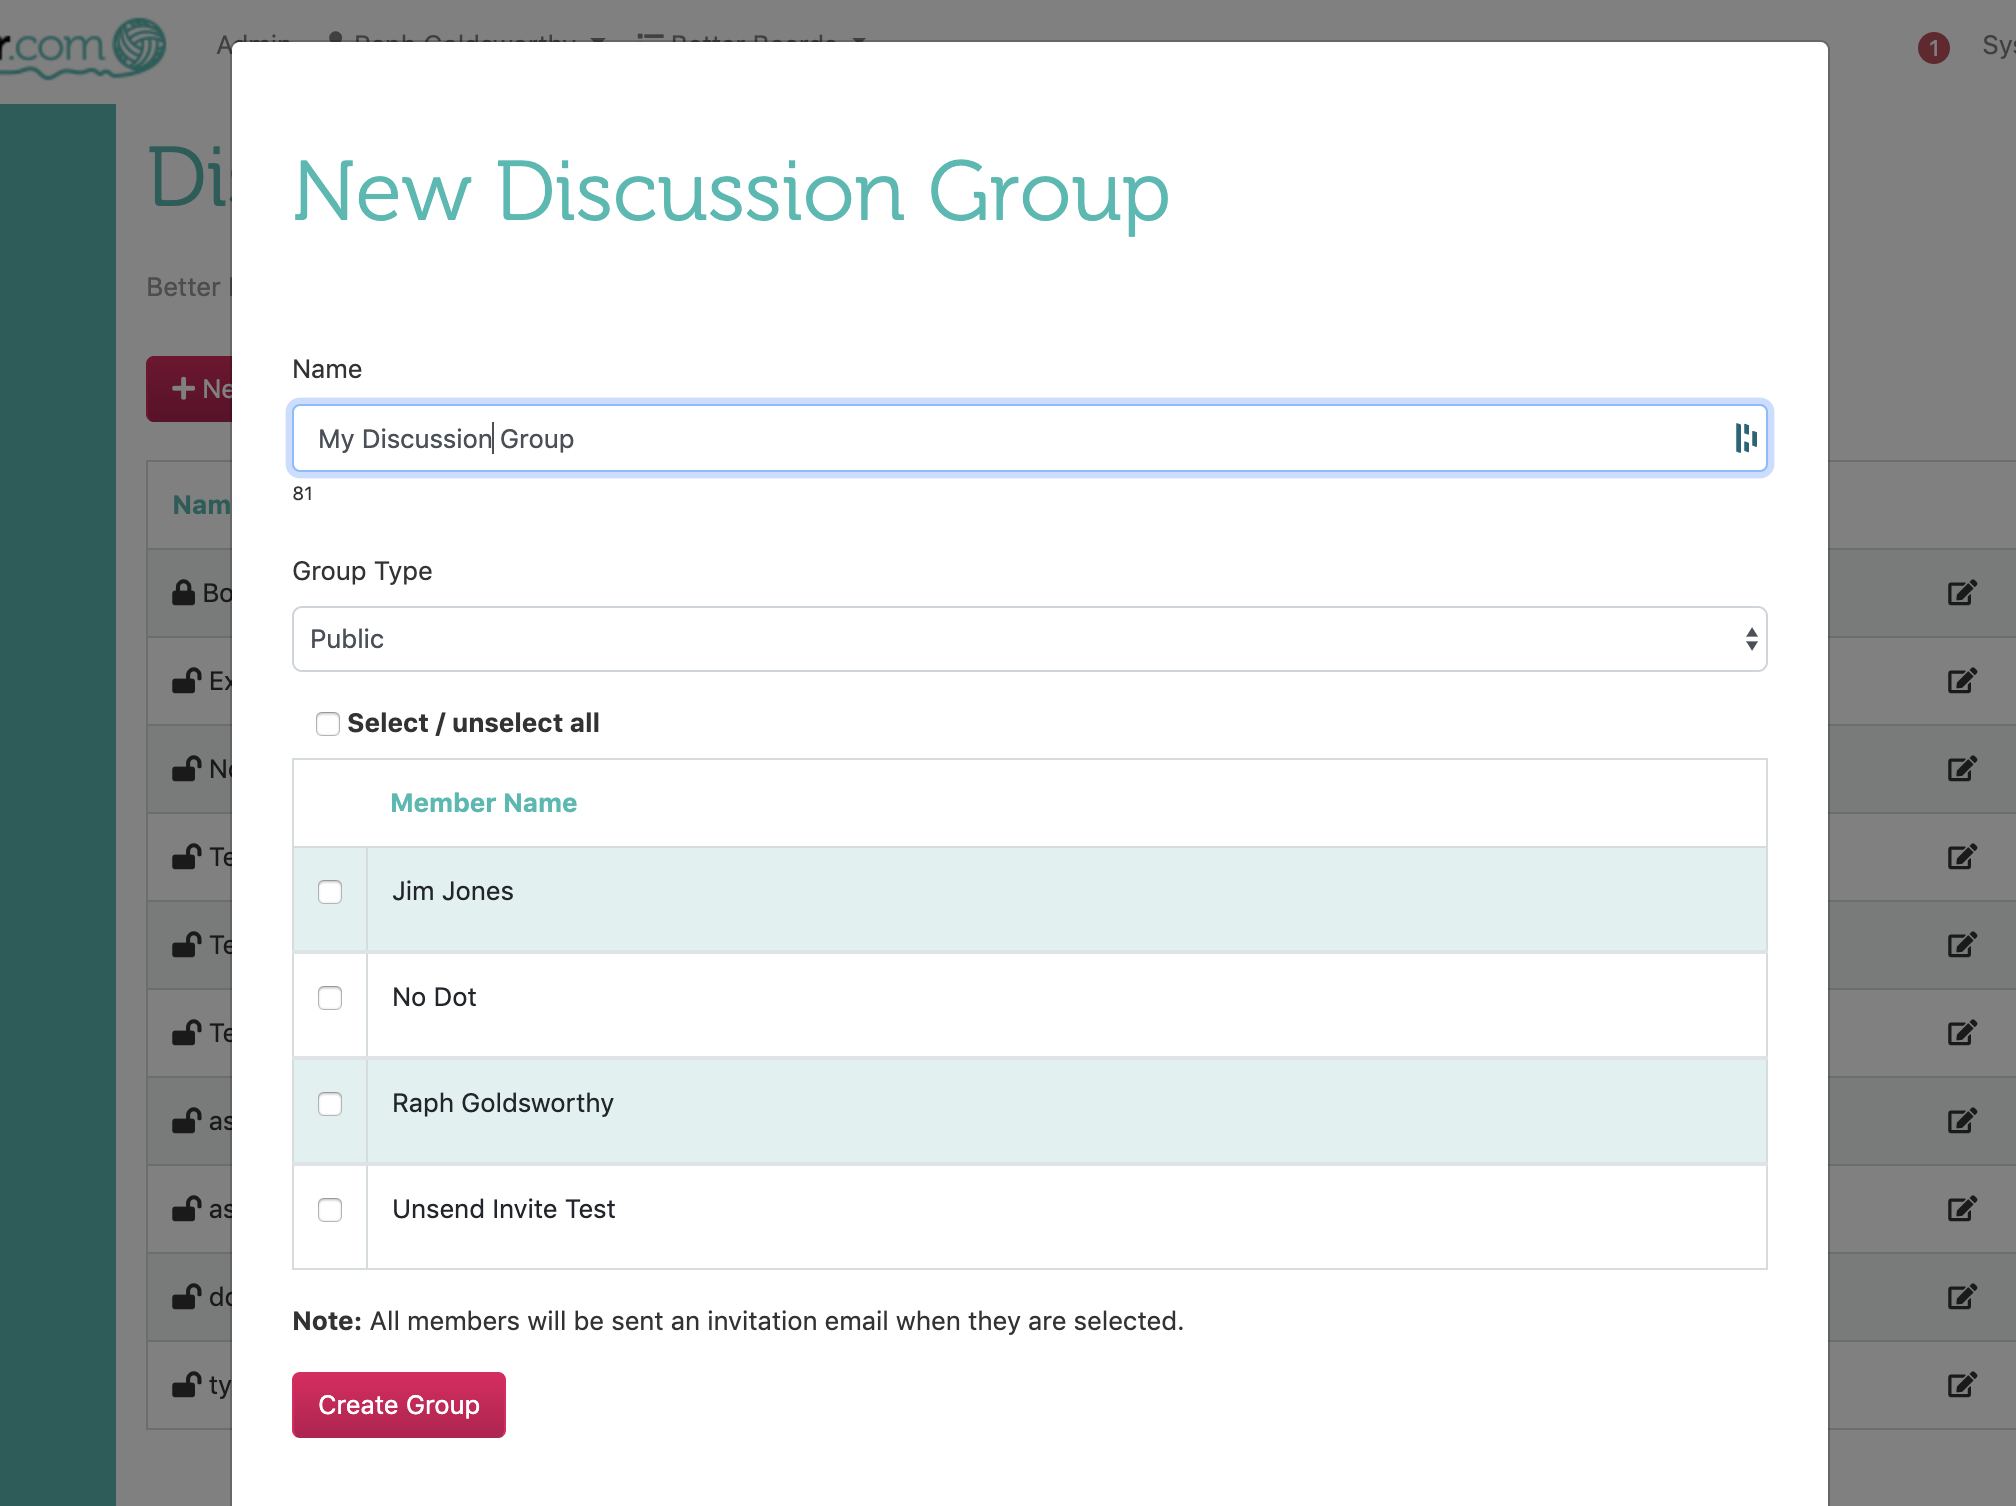
Create a Discussion Group
-
Click Discussions in the left hand menu.
-
Click the New Group button on the top left.
-
In the modal that appears give the group a name, choose if it is public or private group.
-
Select members to invite to the group.
-
Click the Create Group button.
-
The group will now show in the list of discussion groups.
-
Click the name of the group to open it and start your first discussion.
Public vs. Private Discussion Groups
Discussion Groups can be set as Public or Private. You can switch between the two if you need to once the group is created.
Public Discussion Groups
Public Discussion Groups are identifiable by the symbol to the left of the group name.
Public Discussion Groups are accessible to all members on your portal, even if you have not specifically invited them. Members can add (using ) or remove (using ) themselves from Discussion Groups that are Public using the icons that appear on the left hand side of the discussion group.
Private Discussion Groups
Private Discussion Groups are identifiable by the symbol to the left of the group name.
Private Discussion Groups are only accessible to Administrative users, the Group Owner and to those invited to them. Group access can only be granted by a user with an Admin role or the Group Owner.
Permission a Discussion Group
There several ways to permission a group, when you create it or after creation.
Permission on Creation
When the group is created you have two sets of options for permissioning the group access.
-
You can choose Group type: Public (Default selection) or Private.
-
You can choose who to invite using the list of members below. The members selected will immediately receive a notification when you click the Create Group button.
Editing Permission/Group type
Once a group is created you can still change how it is permissioned.
If you are the group owner or an Admin user you can access the group settings by clicking the edit icon to the right hand side of the group. This will open the Edit Group modal which lists the same options as the group creation modal. Here you can edit the group name, group owner, group type and change members.
To save changes to the group name, group owner, group type click the Save Group Attributes button in the middle of the modal.
To save changes to the group member list click the Update Group Members button at the very bottom of the modal.
Add/Remove member to an existing group
At some point you may wish to add or remove a members from a discussion group.
If you are the group owner or an Admin user you can access the group settings by clicking the edit icon to the right hand side of the group. This will open the Edit Group modal.
Then navigate to the list of members.
To add a member to the group tick the box next to their name.
To remove a member untick the box next to their name.
Delete a Discussion Group
Danger
This action, deleting an entire discussion group is irreversible. Deleting the discussion group will delete all discussions inside it.
You can only delete a discussion group if you are an Admin or the owner of the discussion group.
To delete a discussion group navigate to the main Discussions page.
Find the discussion group you'd like to delete. On the right hand side you will see a Trash Can icon.
Click the trash icon and you will be asked to confirm you action.
Create a New Discussion Topic
Navigate into a discussion group you are a member of by clicking the name of the group.
If this is the first time a discussion the page will be empty.
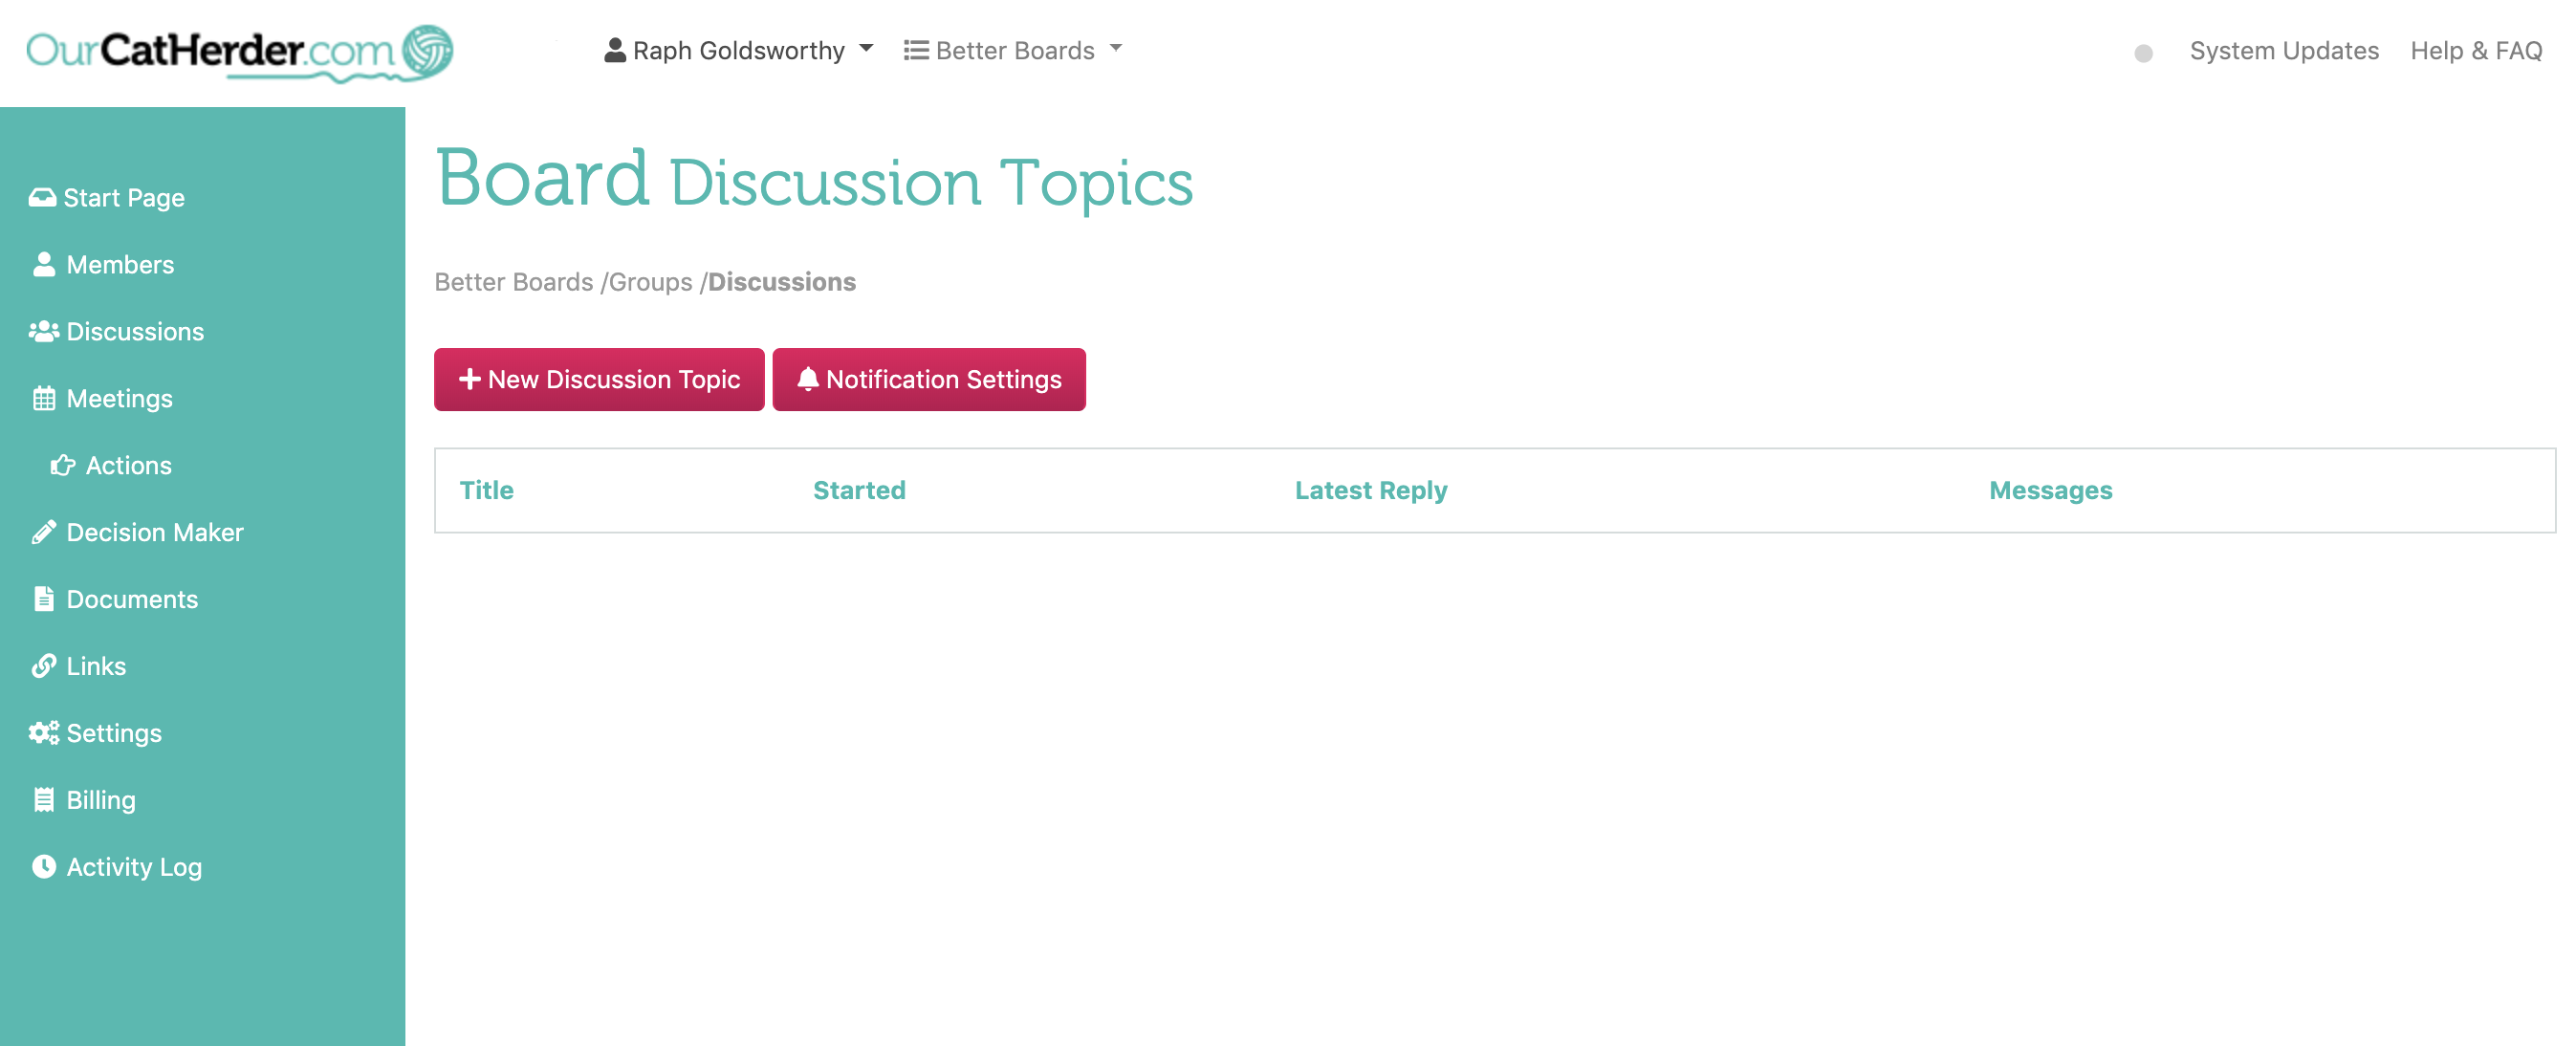
To create a new discussion in this discussion group click the New Discussion Topic button.
This will open the New Topic modal.
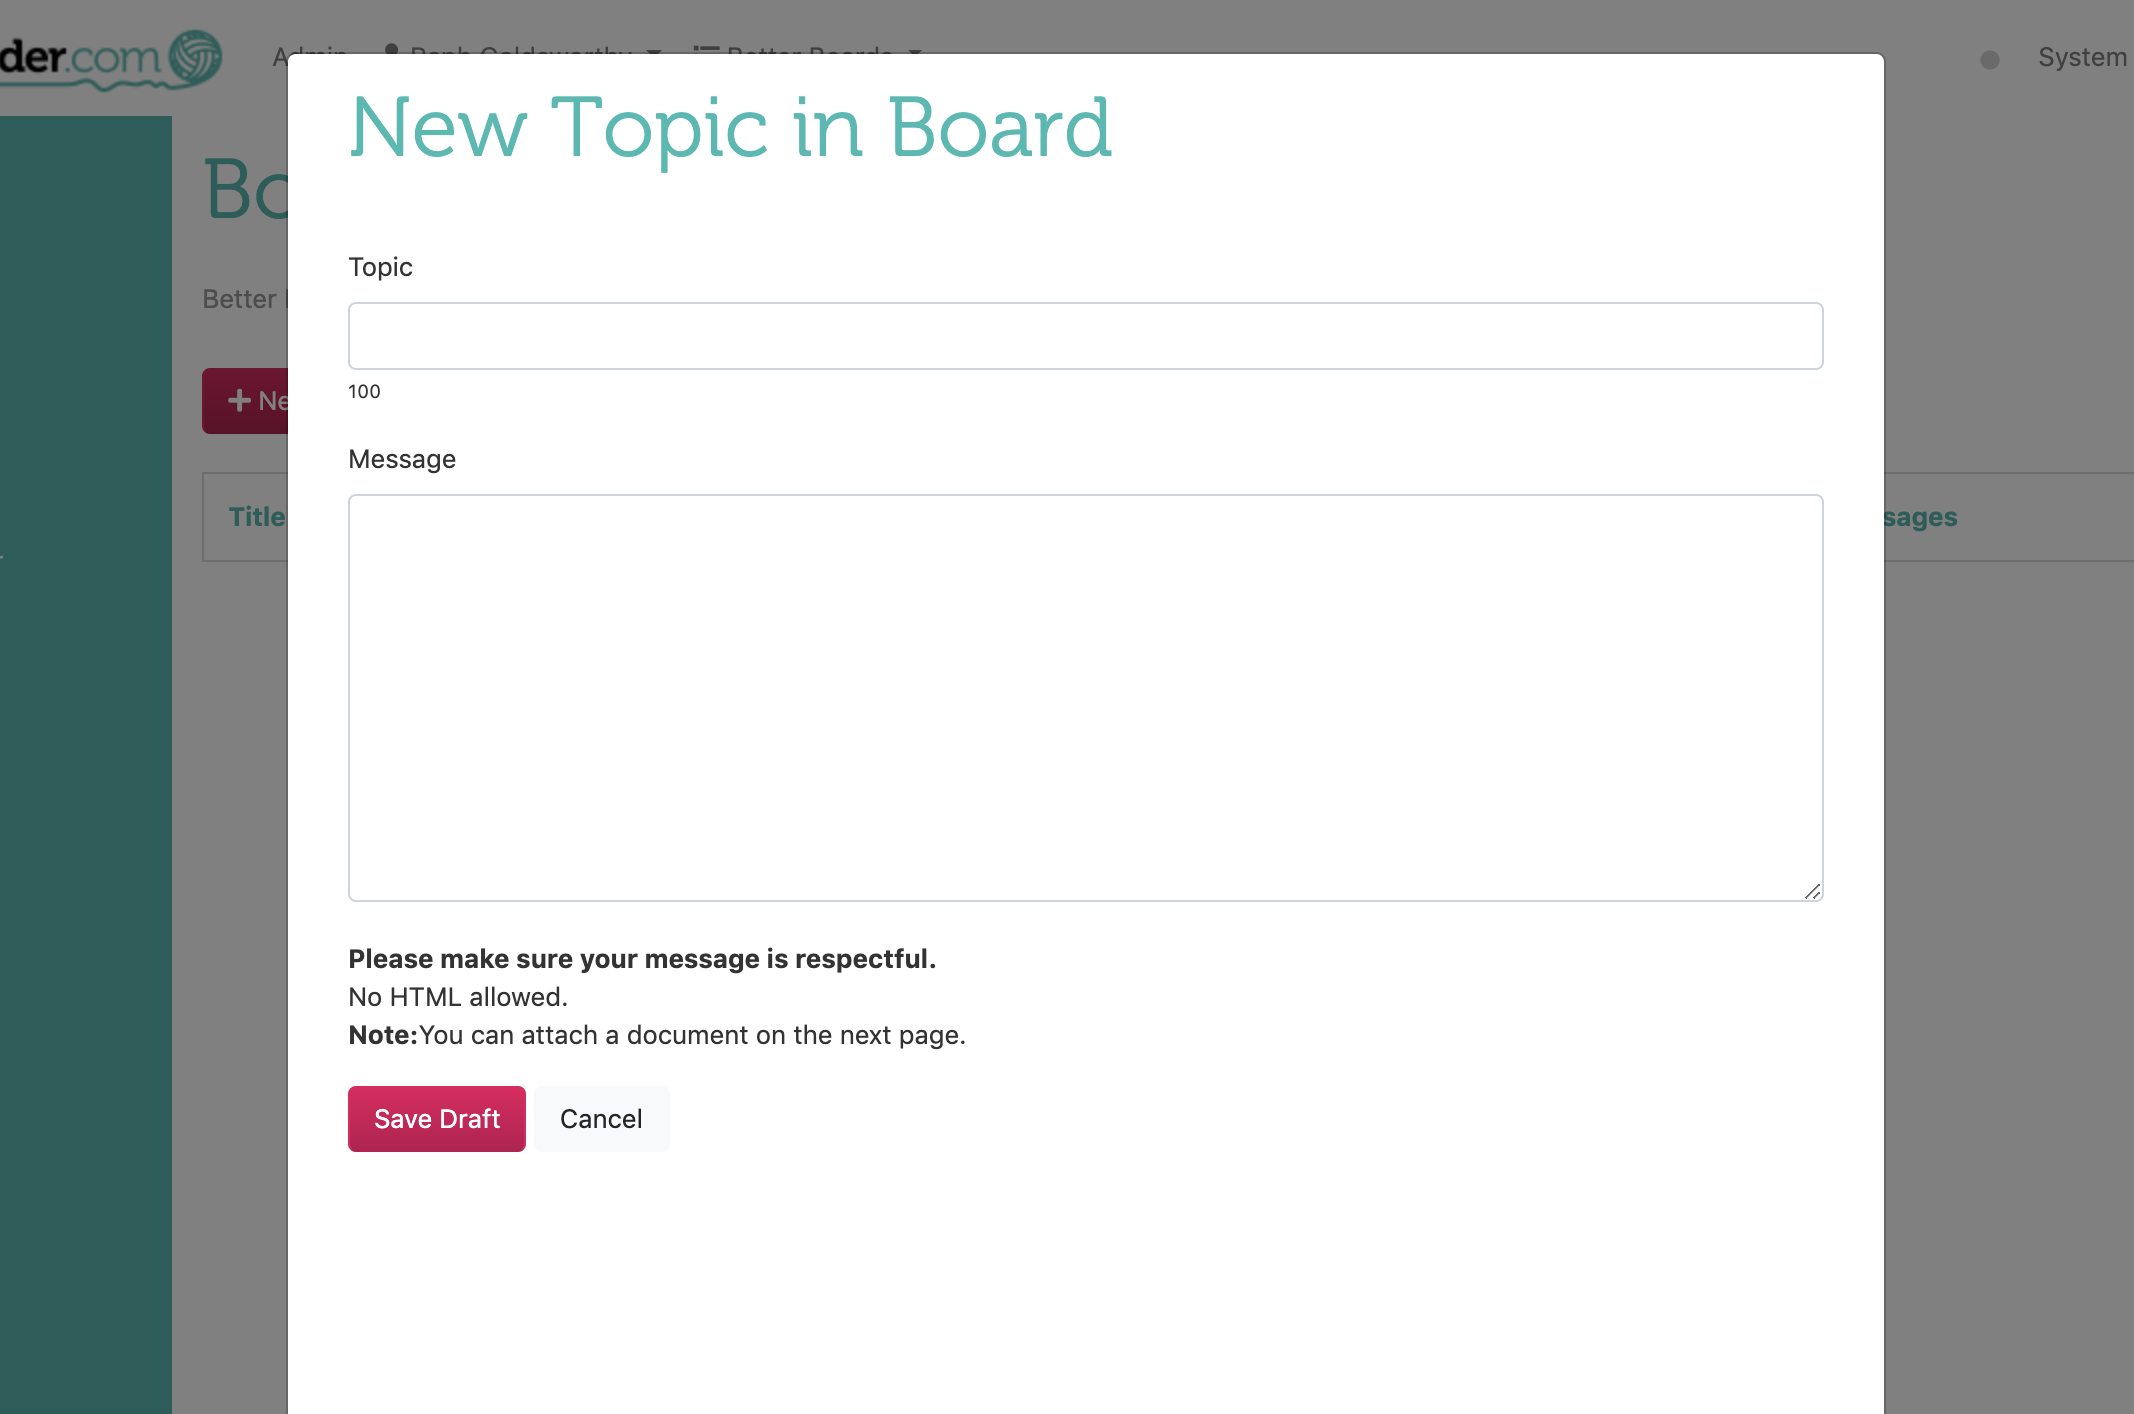
Fill in a topic name and a message. Click the Save Draft button.
On the next screen you will have the option to attach files.
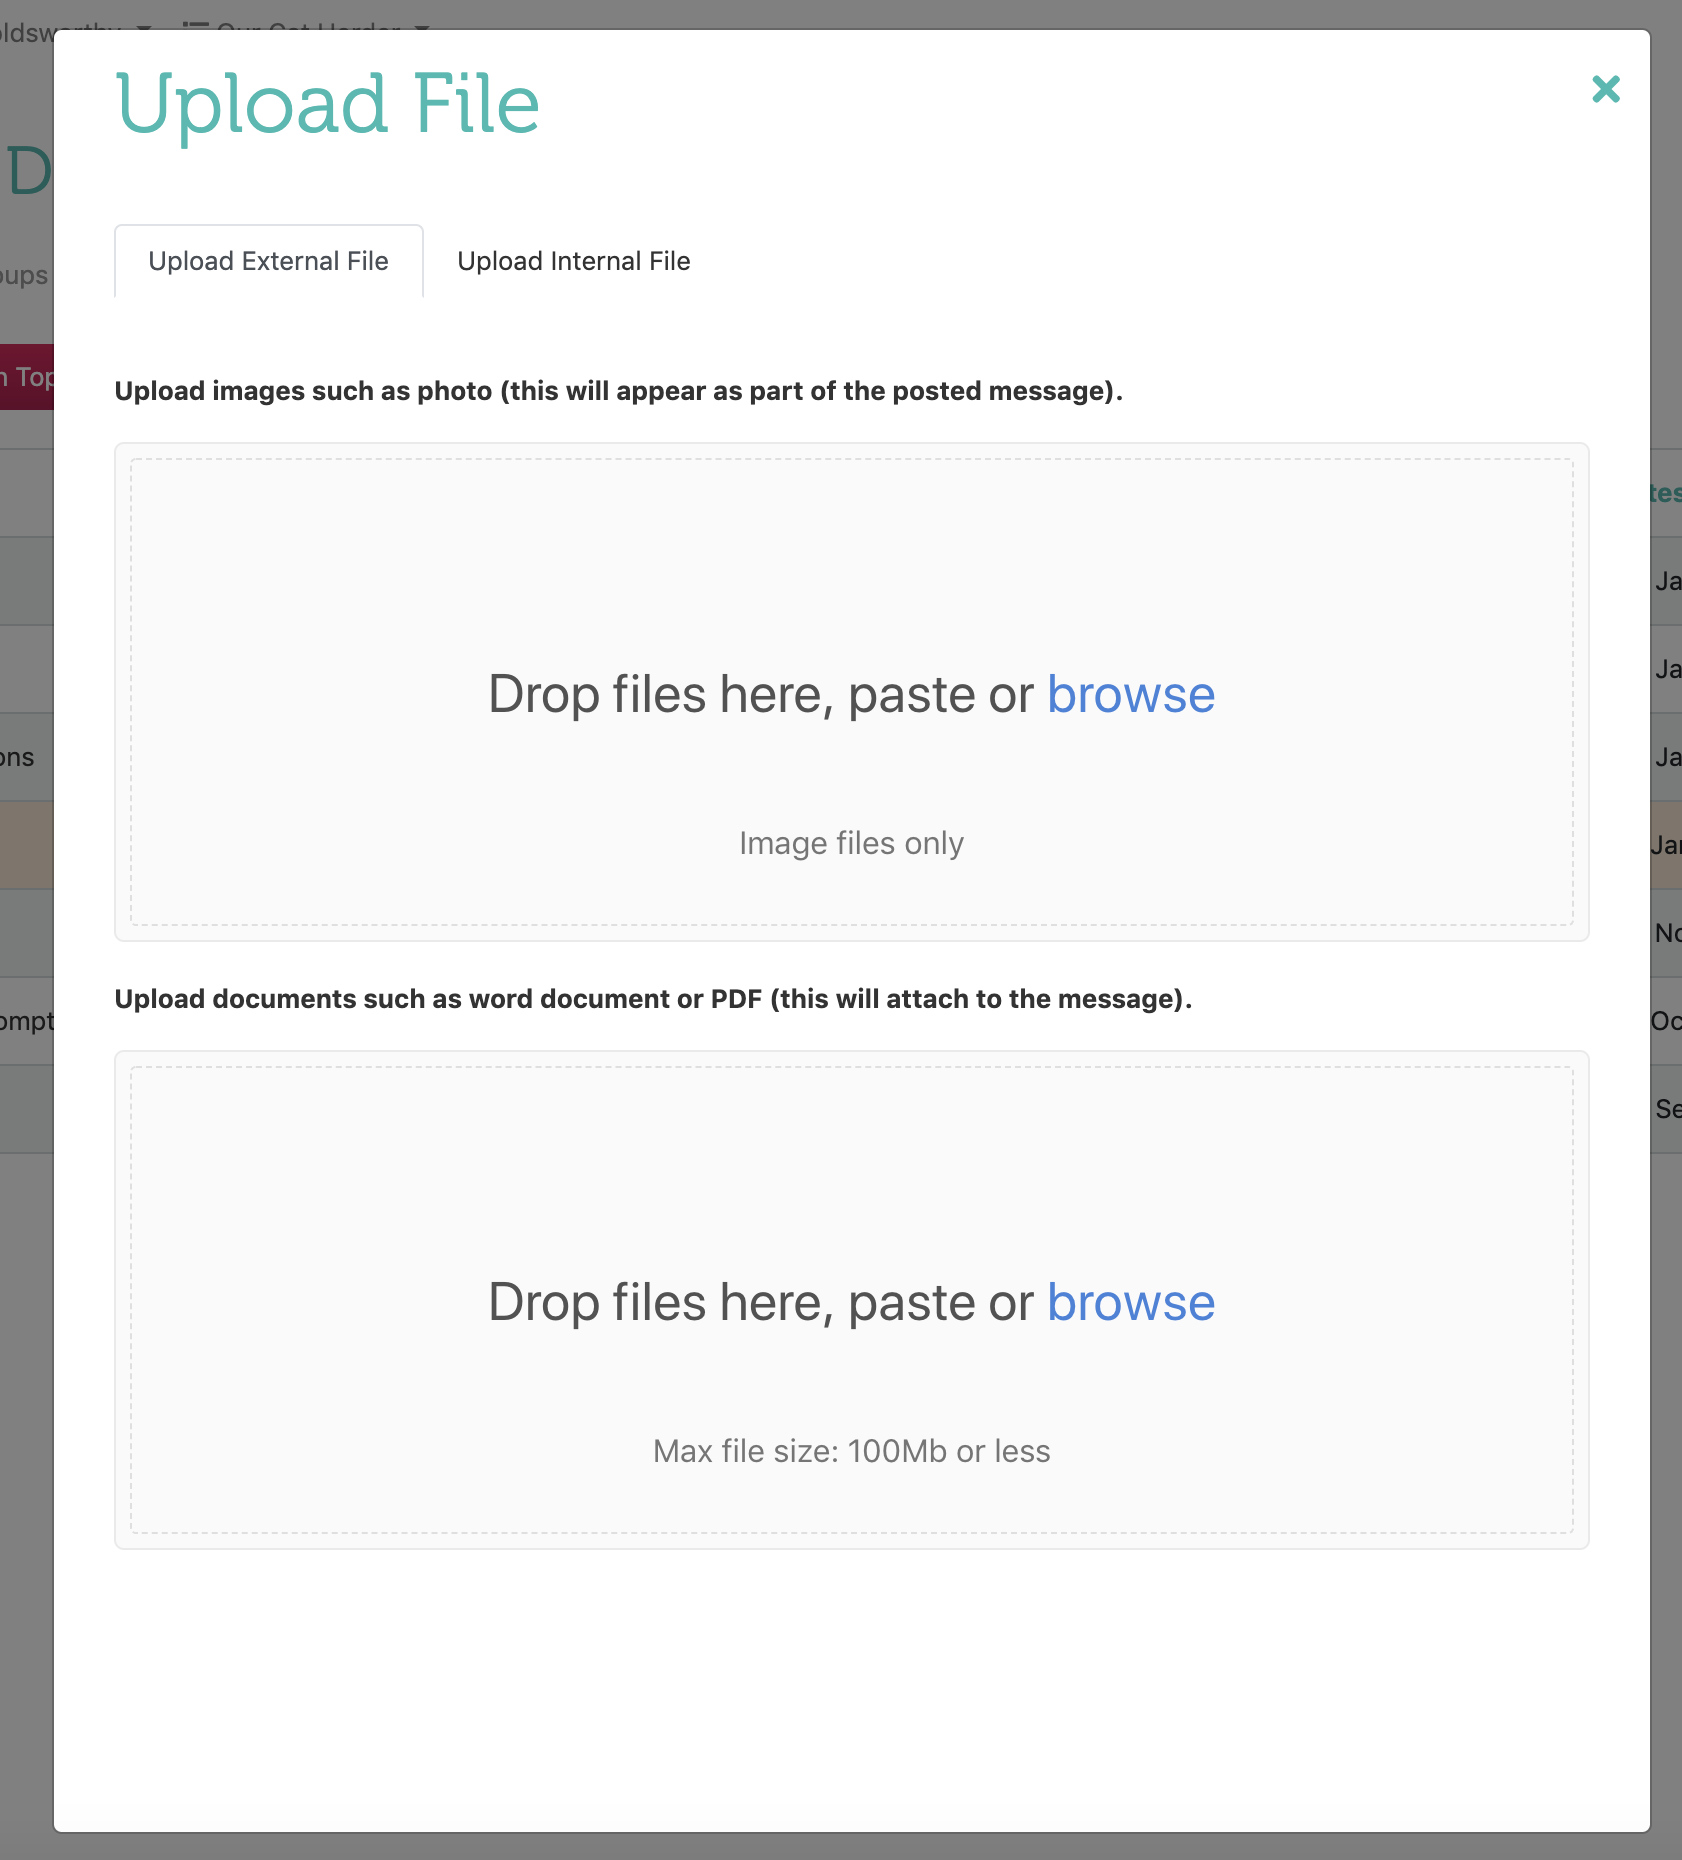
You can choose to upload internal (from Our Cat Herder Documents) or external (from your Computer) files using the tabs at the top.
There are also two upload spaces here.
The top one is for adding images that will be visible in your post.
The bottom one is for attaching documents (PDF, Word, Excel etc...).
If you would like to skip adding files simply click the button in the top right corner of the modal.
Your post is now in Draft mode.
To publish it and send notifications to all portal members who are part of the current discussion group click the Publish Post button.
Add additional discussion posts
Open the discussion post you wish to respond to.
Navigate to the bottom of the discussion thread.
Click the Post a Reply button.
Type your message
Click Post a Reply button. On the next page you can choose to add files to your post.
If you would like to skip adding files simply click the button in the top right corner of the modal.
If you would like to upload a file, you can choose to upload internal (from Our Cat Herder Documents) or external (from your Computer) files using the tabs at the top.
There are also two upload spaces here.
The top one is for adding images that will be visible in your post.
The bottom one is for attaching documents (PDF, Word, Excel etc...).
Edit a Discussion
To edit a discussion post, whether a reply or the original post navigate to the discussion item you need to edit.
Look for the edit icon on the bottom left of the post you need to edit. When you click the edit icon it will open a modal where you can edit the message.
Edit your message and then click the Save button.
On the next modal page you will have the option to add files to your post.
If you would like to skip adding files simply click the button in the top right corner of the modal.
If you would like to upload a file, you can choose to upload internal (from Our Cat Herder Documents) or external (from your Computer) files using the tabs at the top.
There are also two upload spaces here.
The top one is for adding images that will be visible in your post.
The bottom one is for attaching documents (PDF, Word, Excel etc...).
Delete an individual discussion post
To delete a discussion post, whether a reply or the original post navigate to the discussion item you need to edit.
Look for the trash icon on the bottom left of the post you need to delete. When you click the edit icon it will open a modal where you can edit the message.
Delete an entire Discussion thread
To delete an entire discussion thread you will need to delete each post in the thread as per the instructions above.
Groups named Board and Executive Committee
There is a legacy feature in Our Cat Herder discussions that is still active which automatically restricts access to discussion groups named Board or Executive Committee.
If the group is named Board then the following Roles will have access:
- Admin
- Chair
- Co-Chair
- President
- Vice-President
- Secretary
- Treasurer
- Director/Ordinary Member
- Ex-Officio Member
If the group is named Executive Committee then the following Roles will have access:
- Chief Executive Officer
- Public Officer/Company Secretary
- Executive Officer
Updated: 05 March 2020